Recent Fire Damage Posts
Restoring the Past: Cleaning and Restoring Fire-Damaged Documents and Photos
12/18/2023 (Permalink)
A fire can ravage homes and businesses, destroying valuable documents and cherished photos. These items represent memories and history that cannot be replicated, making their loss devastating. Fortunately, trained professionals and specialized equipment can restore these items, even after severe fire damage. In this blog, we will explore the process of cleaning and restoring fire-damaged documents and photos.
Assessing the Damage
The first step in the restoration process is assessing the extent of the damage. Document restoration experts can evaluate the condition of the items and determine the best course of action. They assess factors such as the degree of exposure to smoke and water, the level of charring, and any existing mold or other contaminants.
Cleaning the Documents and Photos
Once the assessment is complete, the actual cleaning process begins. It involves removing any debris, soot, and other fire-related residue that accumulates on the items. The process is delicate, and it requires specialized equipment to avoid further damage. Below are the methods employed in the cleaning process:
Dry Cleaning: This method uses soft brushes, and vacuums to remove the smoke and soot from the surface of the item carefully. It is used to clean sturdy items such as books, binders, and other non-porous surfaces.
Wet Cleaning: Wet cleaning involves using specialized chemicals and water to remove smoke, soot, and debris from the surface of the item. Wet cleaning is appropriate for items such as photographs or paper materials that cannot withstand dry cleaning methods.
Freeze Drying: In cases where the items are soaked with water, freeze-drying is used to restore them. This process involves freezing the items to minimize further water damage and then slowly drying them over a period of time in a vacuum using specialized equipment.
Digital Restoration
After being cleaned and dried, the next step is digitizing the items. Digital restoration technology provides an effective solution for restoring damaged photos and documents. Professional restorers use specialized software and hardware to remove creases, tears, and other physical damage in scanned versions of the items, effectively restoring them to their original condition.
Storage
After the restoration process is complete, the documents and photos must be carefully stored to prevent future damage. They are placed in acid-free storage containers, folders, or envelopes to maintain their quality and integrity. It is essential to store the items in a cool, dry place away from direct sunlight and moisture to avoid further damage.
At times, it may seem hopeless to restore items damaged by fire. Fortunately, document restoration experts are equipped with specialized equipment and expertise to restore fire-damaged documents and photos. The restoration process involves careful evaluation, cleaning, digital restoration, and careful storage in acid-free containers. Through this process, these valuable items can be preserved and cherished for many years to come.
When Should I Change Smoke Alarm Batteries? A Guide to Ensuring Your Smoke Alarms are Always Ready
9/12/2023 (Permalink)
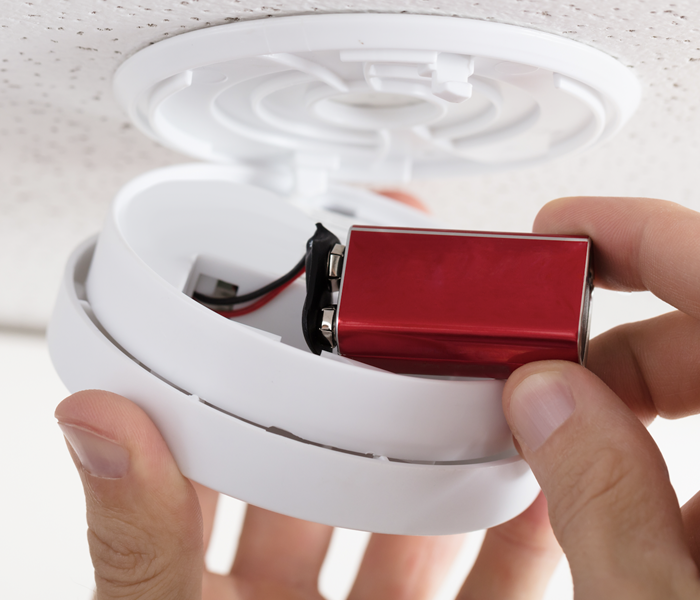 Changing smoke alarm batteries frequently is essential to ensuring your property is safe incase of a fire.
Smoke alarms are an essential safety feature in every home, helping to alert you and your family to the presence of smoke and potential fires. But to ensure their effectiveness, it's crucial to regularly maintain and replace the batteries in your smoke alarms. In this blog post, we'll discuss when you should change smoke alarm batteries and provide helpful tips to keep your home safe.
General Guidelines for Battery Replacement
Test Your Smoke Alarms Monthly
It's essential to conduct a monthly test of your smoke alarms to ensure they are functioning correctly. This will help you identify any issues and ensure that the batteries are still working. During the monthly test, listen for the loud, distinctive beep that indicates the alarm is functioning properly.
Replace Batteries Twice a Year
To ensure optimal performance, it's recommended to replace the batteries in your smoke alarms at least twice a year. A good rule of thumb is to change the batteries when you change your clocks for daylight saving time. This makes it easy to remember and helps ensure a regular schedule for battery replacement.
Use Long-Life Batteries
Consider using long-life lithium batteries for your smoke alarms. These batteries have a longer lifespan compared to traditional alkaline batteries and can last up to 10 years. However, it's still important to check and test your smoke alarms regularly, even if they are equipped with long-life batteries.
Additional Factors to Consider
Most smoke alarms are equipped with a low battery warning feature. When the battery power gets low, the alarm will emit a periodic chirping sound. If you hear this sound, it's a clear indication that it's time to replace the batteries. Do not ignore or disable the low battery warning, as it compromises the effectiveness of the smoke alarm.
Aging Smoke Alarms
Smoke alarms have a recommended lifespan of 10 years. After this period, they may become less effective and unreliable. It's a good practice to replace smoke alarms that have reached or exceeded their expiration date.
In addition to battery replacement, ensure that your smoke alarms are clean and free of dust. Regularly vacuum or blow air through the vents to keep them functioning optimally. Also, regularly check the manufacturer's instructions for specific cleaning and maintenance requirements for your smoke alarms.
Regularly changing smoke alarm batteries is essential for maintaining a safe home environment. By following the general guidelines of testing monthly and replacing batteries twice a year, you can ensure that your smoke alarms are always ready to detect smoke and potential fires. Remember to use long-life batteries, pay attention to low battery warnings, and replace aging smoke alarms as needed. By prioritizing maintenance and battery replacement, you can have peace of mind knowing that your smoke alarms are working effectively to protect your home and loved ones.
Relief for Burns. A Guide to Basic First Aid for Burn Injury.
4/28/2023 (Permalink)
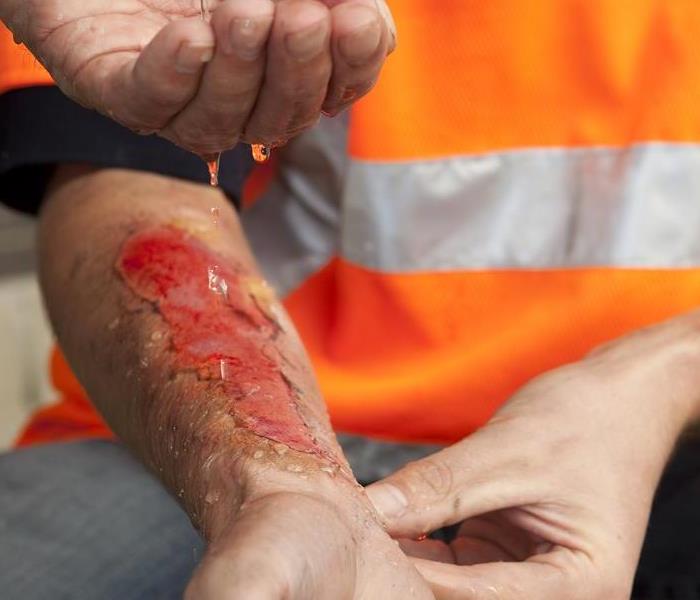 Seeking immediate medical attention to help reduce burn and infection.
Burns are one of the most common injuries that people can sustain, both at home and at work. They can be caused by a variety of things, including hot liquids, flames, chemicals, and electricity. While some burns are minor and can be treated at home, others require immediate medical attention. In this blog post, we’ll discuss basic first aid for burns that you can use to help relieve pain and promote healing.
Types of Burns
Before we dive into first aid for burns, it’s important to understand the different types of burns. There are three types of burns:
First-degree burns: These are the mildest type of burns and only affect the outer layer of skin. They’re usually red, painful, and can be treated at home.
Second-degree burns: These affect both the outer and underlying layer of skin. They’re usually red, swollen, and painful. Blisters may also form.
Third-degree burns: These are the most severe type of burns and affect all layers of skin. They can be white or black in color, and the skin may appear leathery or charred. Third-degree burns require immediate medical attention.
First Aid for Burns
For first-degree burns, you can usually treat them at home using the following steps:
Cool the burn: Run cool (not cold) water over the burn for at least 10 minutes to help relieve pain and reduce swelling.
Cover the burn: Apply a sterile gauze bandage or a clean cloth to the burn to help keep it clean and reduce the risk of infection.
Take over-the-counter pain medication: If the burn is painful, take an over-the-counter pain medication like ibuprofen or acetaminophen.
Avoid breaking any blisters: If the burn has formed blisters, do not break them. This can increase the risk of infection.
Keep the burn clean: Change the bandage at least once a day and keep the burn clean.
While first-degree burns can usually be treated at home, second-degree and third-degree burns require medical attention. You should seek medical attention if the burn is larger than three inches in diameter, is on your face, hands, feet, or genitals. The burn is deep and white or black in color, or the burn is caused by electricity, chemicals, or radiation.
Burns can be painful and require prompt attention to avoid further damage or infection. By following these basic first aid steps for burns, you can help relieve pain and promote healing. Remember, if you’re unsure about the severity of a burn, it’s always best to seek medical attention.
How To Inspect a Fireplace
12/7/2022 (Permalink)
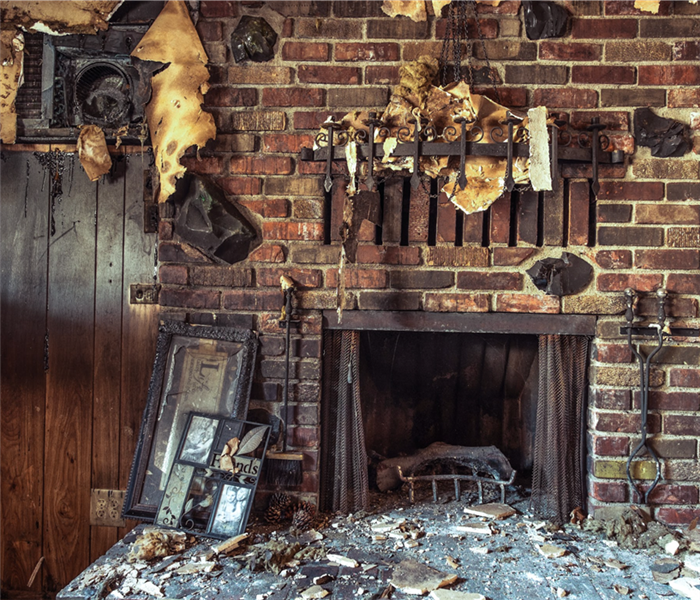 Schedule a chimney inspection with a professional.
If you have a fireplace in your home, it is important to inspect it regularly. A chimney inspection will help you maintain the safety and effectiveness of your fireplace. Here’s how:
Inspect the Inside of Your Fireplace
First, inspect the hearth (the bottom surface where logs rest) and firebox (the area between them). If they're damaged or missing, they must be replaced before using your fireplace again.
Then, check for damage to stove pipe vents—they should not leak smoke from their joints when air pressure changes during operation.
Clean Out Ashes
It's important to remove ashes from your fireplace before they get too hot. To do so, you'll need to use a fireplace tool, which will help you scoop out any remaining ashes in the hearth.
If you don't have a fireplace tool, use a broom or dustpan instead. You should also check your chimney for blockages regularly (every two weeks) and remove them as needed: sticks, leaves, and other debris can get stuck in the flue and cause damage over time if left unchecked.
It's not recommended that vacuums be used on fireplaces because they can cause sparks which could lead to an accident with potentially serious consequences!
Check for Clearance Issues
Measure the distance between the fireplace wall and the floor. If there are less than 18 inches of clearance, you should consider moving your furniture or furnishings away from the fireplace to create more space. Then, measure the distance between the fireplace wall and any combustible materials such as curtains or hanging rugs that could catch fire if they come in contact with your flames. If there isn't at least 12 inches of clearance, move these objects away from where they might touch hot embers after you've burned a fire in your fireplace. You can also opt for safer alternatives—like vinyl window treatments—to help protect yourself against fires while still enjoying all of those beautiful natural light and heat benefits offered by a roaring fire!
Check for Creosote Buildup
Creosote is a by-product of combustion, so if you're properly burning your fireplace, it should be a rare sight. However, creosote can build up in the chimney over time and cause serious problems. If left unchecked, creosote can ignite and start a chimney fire; this is especially dangerous during the winter months when the temperature outside is below freezing.
If you think that there might be some buildup on the inside of your chimney (it's hard to tell without looking), take caution before lighting your next fire.
Creosote can also cause damage to other components of your fireplace system including flues and damper systems.
Check the Outside of Your Fireplace
Once you've inspected the inside of your fireplace, it's time to turn your attention to the outside. The first thing you should do is check for cracks in the mortar and bricks. If any are found, these need to be repaired before you can use your fireplace again.
Next, look at the flue and see if there are any cracks or holes that need attention.
Schedule a Chimney Inspection with a Professional
If you want to make sure your fireplace is working safely and efficiently, schedule a chimney inspection with a professional. Chimney sweeps are specially trained and experienced in the ins and outs of fireplaces, and they can be an invaluable resource when it comes to getting the most out of your fireplace. You should schedule an inspection every year if possible; if not possible due to lack of funds then at least once every five years would be ideal as well.
As you can see, chimney cleaning is an important part of fireplace maintenance. If you want your fireplace to stay safe and effective, it is important to regularly inspect it and schedule chimney cleanings.
If you want to keep your fireplace safe and functional, it is important to regularly inspect the outside of it. This will help you identify any issues before they become serious problems that require costly repairs and replacements. Give SERVPRO of Lafayette a call if you experience a fire in your Lafayette, LA home!
4 Easy Steps To Operate a Fire Extinguisher
8/29/2022 (Permalink)
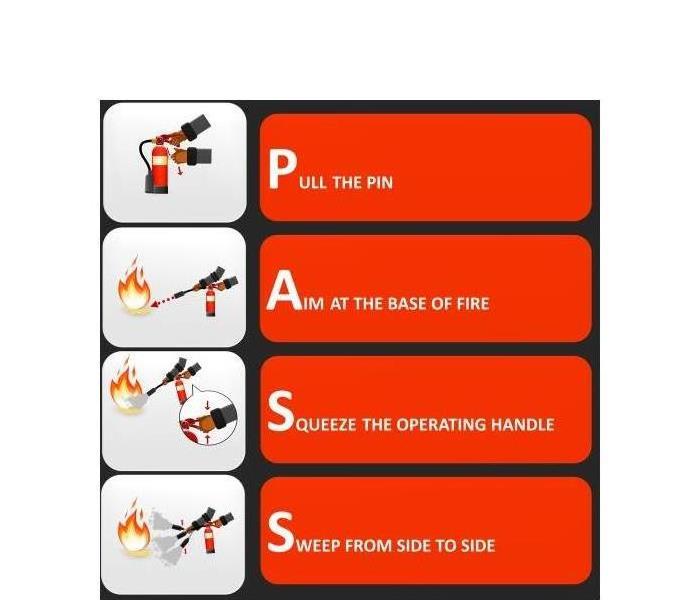 P.A.S.S Technique
Proper Operation Techniques Can Be Learned In Just A Few Moments
Fires spring up suddenly in homes every day. A couple of inexpensive and easy-to-use tools can protect your family from the damaging effects of fire and reduce the damage to your property. Fire alarms should be installed throughout your home in Lafayette, LA, and they should be tested a couple of times a year to ensure they are working properly. A fire extinguisher or two should also be in every home. Just as importantly, every person in the home 10 years or older should know how to use the device.
1. Pull the pin - Nearly every fire extinguisher will be equipped with a pin or tamper seal to make certain the device does not prematurely discharge. The first order of business is to pull the pin or break the tamper seal.
2. Aim the extinguisher - You do not want to aim the device at the top of the flames. Rather you want to aim low at the fire's base. This will be the most effective way to put the fire out quickly and limit fire damage to your home. Some models have a hose while others have a short nozzle.
3. Squeeze the trigger - Now you are ready to discharge the contents of the extinguisher. Just squeeze the handle and the extinguishing agents will come rushing out.
4. Sweep the area - While the contents are being discharged, be sure to sweep across the base of the fire, moving from side to side. This is the most effective motion whether you are dealing with a kitchen fire or another type of blaze.
Learning how to properly use a fire extinguisher strengthens your household's response to a fire. Developing a relationship with a fire mitigation team in your area is also a good idea. This allows you to call for restoration help if you do experience a fire in your home.
3 Steps for Cleaning Dryer Lint
8/20/2022 (Permalink)
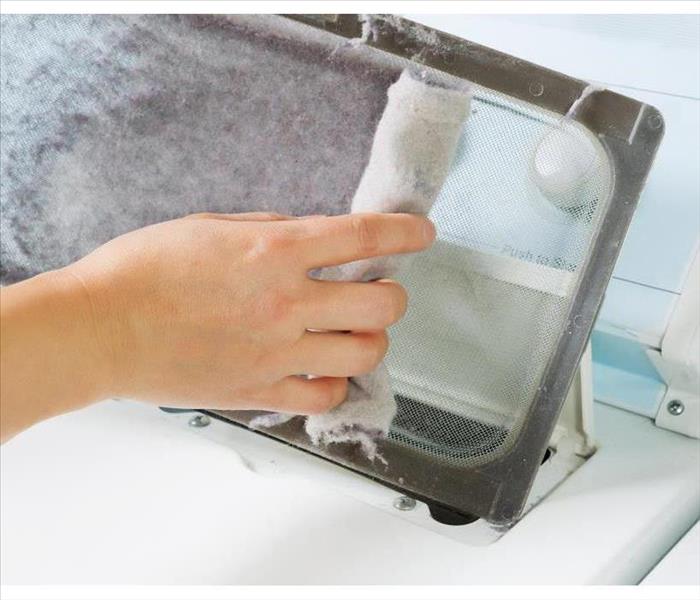
 Clean the lint screen of your dryer
Three Steps To Avoid Calling a Fire Restoration Company
Did you know that your clothes dryer can be a cause of a home lint fire? According to the United States Fire Administration, there are about 2,900 clothes dryer fires reported each year. The USFA also states that almost 35% of those fires could have been prevented if the dryer had been cleaned. Ensure that your Lafayette, LA, home doesn’t suffer the devastating effects of fire damage by cleaning your dryer regularly. Here are three steps to follow to avoid needing to call a fire restoration company.
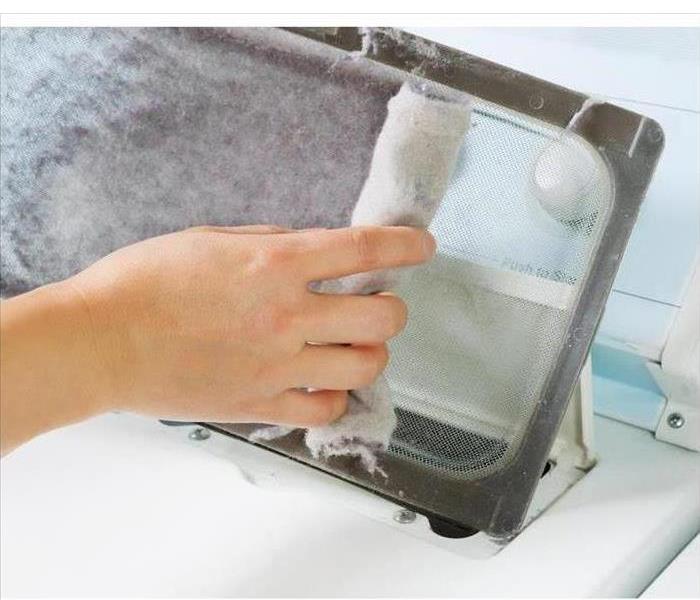
1. Clean the Screen
The first part to clean is the lint screen. Every clothes dryer has a lint screen located on top or inside the bottom of the door. There are three ways to remove lint from the screen:
- Run your fingers gently across the screen
- Wipe a used dryer sheet on the screen
- Use a vacuum brush attachment
It’s important to clean the lint screen before each new load to prevent a lint fire. If you use dryer sheets, remove the screen every month and run it under water to remove any residue.
2. Deep Clean the Vents
In addition to cleaning the screen, it’s necessary to deep-clean the vents at least once a year. Lint can get trapped and accumulate inside the vent, which leads to inefficient drying and possible combustion. Fortunately, cleaning the vent isn’t difficult.
First, unplug the dryer and shut off the power to the machine. Next, move the dryer away from the wall and remove the hose. Third, gently wipe the interior or put a vacuum attachment inside to pull out the lint. Finally, use a dryer cleaning kit and follow the instructions to clean the wall vent.
3. Clean the Exterior and Interior
Cleaning the outside and inside of the appliance prevents a dryer fire. Remove the back panel of your dryer with a screwdriver and gently wipe all areas with a soft cloth. Check inside as well to remove any lint in the drum.
Removing lint from the screen before each load and thoroughly cleaning the vents and dryer can prevent a lint fire.
Your Dryer Could Be a Fire Hazard
6/26/2022 (Permalink)
 Improper cleaning of your dryer machine can cause lint fire.
As a homeowner in Lafayette, LA, you frequently rely on your home dryer. Did you know that improper cleaning and use of the machines can cause lint fire. Although useful, residents must understand how to maintain their units and mitigate potential trouble. The following are statistics about potential dryer blazes and what owners should do to safeguard their homes.
How Often Does a Dryer Fire Occur?
Yes, you use the dryer often and don't have a problem. However, the potential for flames is higher than you may believe. The National Fire Protection Agency notes that most home fires result from lint, dust and fiber, with approximately 92% of household fires involving the clothes dryer. In addition, the United States Fire Administration reports the following statistics.
Approximately 2,900 dryer fires get reported annually
Property loss claims amount to as much as $35 million a year
27.6 of dryer units ignited because of lint or material buildup
How Do the Fires Start?
Dryer fires often start because the machines develop a buildup. When clothes tumble around, they shed lint. These flammable fibers are released from your blankets, shirts and pants during the dryer's run, accumulating on trap and exit tubes. When this fluff overheats, a lint fire begins.
How Can You Minimize This Impending Threat?
Take care to install your machine correctly and have it regularly serviced, ensuring it's in proper working order. In addition, establish a routine system for clearing lines from the dryer components. Empty the trap after each cycle. Then, check the area behind the dryer at least once a month. Have a service crew fix any signs of damage immediately. Hire professionals to clean it at least once a year.
Enjoy your dry clothes and understand the importance of avoiding a lint fire. If flames occur, leave home and call for help. Have an expert fire remediation team inspect, sanitize and repair the room.
Cleaning Up Your Company After a Fire
3/29/2022 (Permalink)
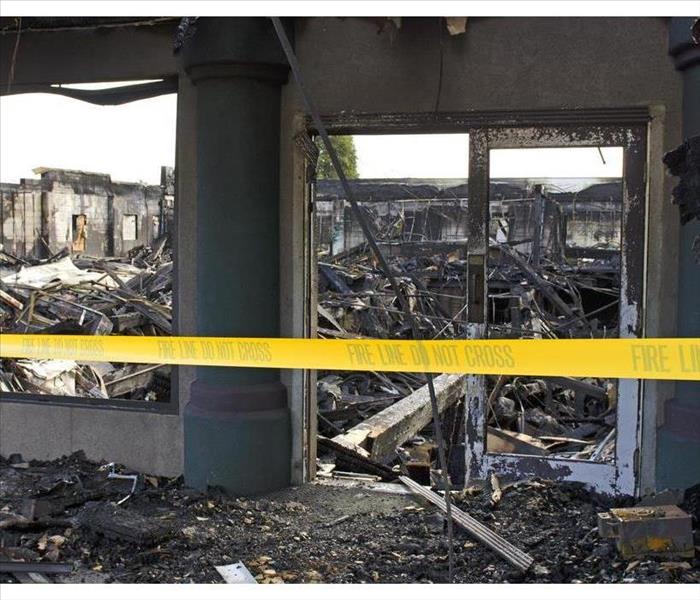 Commercial fire damage in Lafayette, LA.
Fire Remediation Process
A fire at your Lafayette, LA, commercial property can be an overwhelming process. It starts with panic and safety concerns and ends up leaving you wondering about the cost of cleanup. Although it’s difficult to plan for a fire, there are several steps you can take to manage the remediation process to effectively handle fire and smoke damage.
1. Contact the Insurance Company
The first step after any fire is to contact your insurance company. They will be able to answer detailed questions about exactly which items they will replace and get you immediate funding for cleanup. If there are questions about damage to employee property, your insurance agent will be able to give you direction on what to tell them.
2. Secure the Building
It’s often an overlooked step, but you need to make sure to secure the property. There could be looting or trespassers in unstable areas, and you are liable for injuries that occur. Make sure any windows, walls or roofs that were broken by firefighters are boarded up and warning signage is posted.
3. Cleanup Fire Damage
The next step is to call professional fire restoration specialists. Items not obviously damaged in the fire might have incurred smoke damage. Walls and carpets can have a gray or black tint from soot damage, and they could be harboring invisible contaminants as well. At a minimum, they will have a smell that needs professional smoke cleaning. A competent restoration company will leave your property looking “Like it never even happened."
No owners want to deal with a fire in their business. However, the cleanup process doesn’t have to be especially complicated. The first step is to contact your insurance company and then secure the premises to prevent further damage. A fire restoration company will walk you through the process to remove all smoke damage and get your facility back up and running quickly.
5 Tips for Preventing Your Pets from Starting a House Fire
2/23/2022 (Permalink)
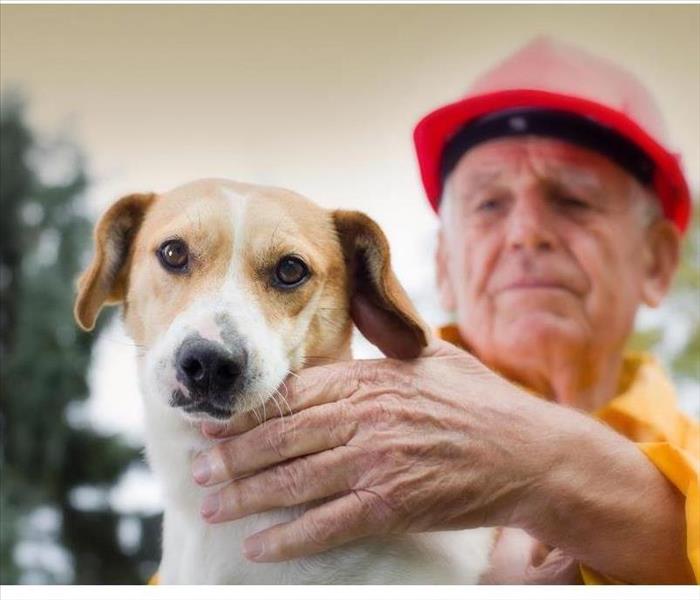 If your home or business suffers from a fire damage event, don't wait! Give SERVPRO a call as soon as possible for your restoration and cleanup needs.
5 Ways To Keep Your Pets From Starting A Fire At The House
If you have any pets in your home in Lafayette, LA, you need to take specific steps to ensure their safety and prevent a possible fire emergency. While you might assume your pets would naturally stay away from flames or behave themselves when you’re away, animals can harm themselves due to their curiosity. Even if your pets are able to escape safely, your home will need to go through some serious home fire restoration to get back to normal! Keep your home and your pets safe with these 5 tips!
1. Put Out Flames
Never your leave your pet unsupervised with an open flame. Always make sure to put out candles, fireplaces, stove tops, and any other open flames in your home before leaving them in a room by themselves.
2. Protect Your Stove
Some cats and dogs will jump or climb on the stove when you’re away, especially if they can smell some leftover food on countertops. Remove your stove knobs or buy covers to protect them as an important pet preparation step!
3. Cover Your Fireplace
Your curious dog or cat might not understand that a lit up fireplace means danger! Ensure your pet’s safety by getting a metal or heat-tempered glass screen for the fireplace when it’s lit up.
4. Consider Candle Alternatives
Even while your home, cats and dogs can easily accidentally knock over candles while they play or move their tails. Avoid this common fire emergency by using battery power candles, diffusers, or other alternatives.
5. Hide Wires
Some pets will chew on wires that are exposed. This is especially true of young puppies. Figure out ways to hide wires or unplug them and make them inaccessible when you’re not at home.
Prevent a fire emergency caused by your pet by following these five tips! Your pet’s curiosity and lack of awareness of their surroundings can get them into trouble, so it is important you create a space that is safe.


 24/7 Emergency Service